Thursday, December 15, 2011

Christmas Ornament Craft

To recycle some more of those unwanted CD's that arrived in the mail, I decided to make Granny's Love aka my Grandson a personalized Christmas Tree Ornament.
Take two of the CD's and glue the printed sides together, so the shiny sides are out.
Then CAREFULLY hold a nail with pliers and heat the nail.
Make a hole in the top of the CD's with the hot nail.
This might take a couple times to heat the nail to make the hole big enough.
This is the hole afterward...
no way can photos be taken with CD's in one hand and a hot nail in the other.
As I said be CAREFUL.
Next I cut out a couple photos of Granny's Love and glued one to each side of the CD's. After the glue dried I took the blue cord and measured around the photos. Then glued the cord down around the photos. I didn't like the way the cord looked where it came together, so I made a bow and glued in on the seam. To finish the ornament I took the cord and put it through the hole in the top of the ornament. I decided to knot my cord for additional decoration, but just the plain cord for a hanger would be plenty.
CD's are hard to photograph, because of the reflections!
These could be made out of old CD's that have been scratched and don't play anymore.
It is just a fun way to recycle CD's.
After I finished Granny's Love's CD ornament I thought I better make one for my granddaughter and her roommate too. I used some of the yard that my daughter had left from enhancing the girls flip flops. It made a neat looking ornament too.

Wednesday, December 14, 2011

Pine Cone Ornaments

Pine Cone Ornaments
Spray paint pine cones
Tie ribbon around the top
Add ornament hook
You will have an inexpensive Christmas tree ornament
(You can add glitter and other decorations)

Tuesday, December 13, 2011

SHOUT

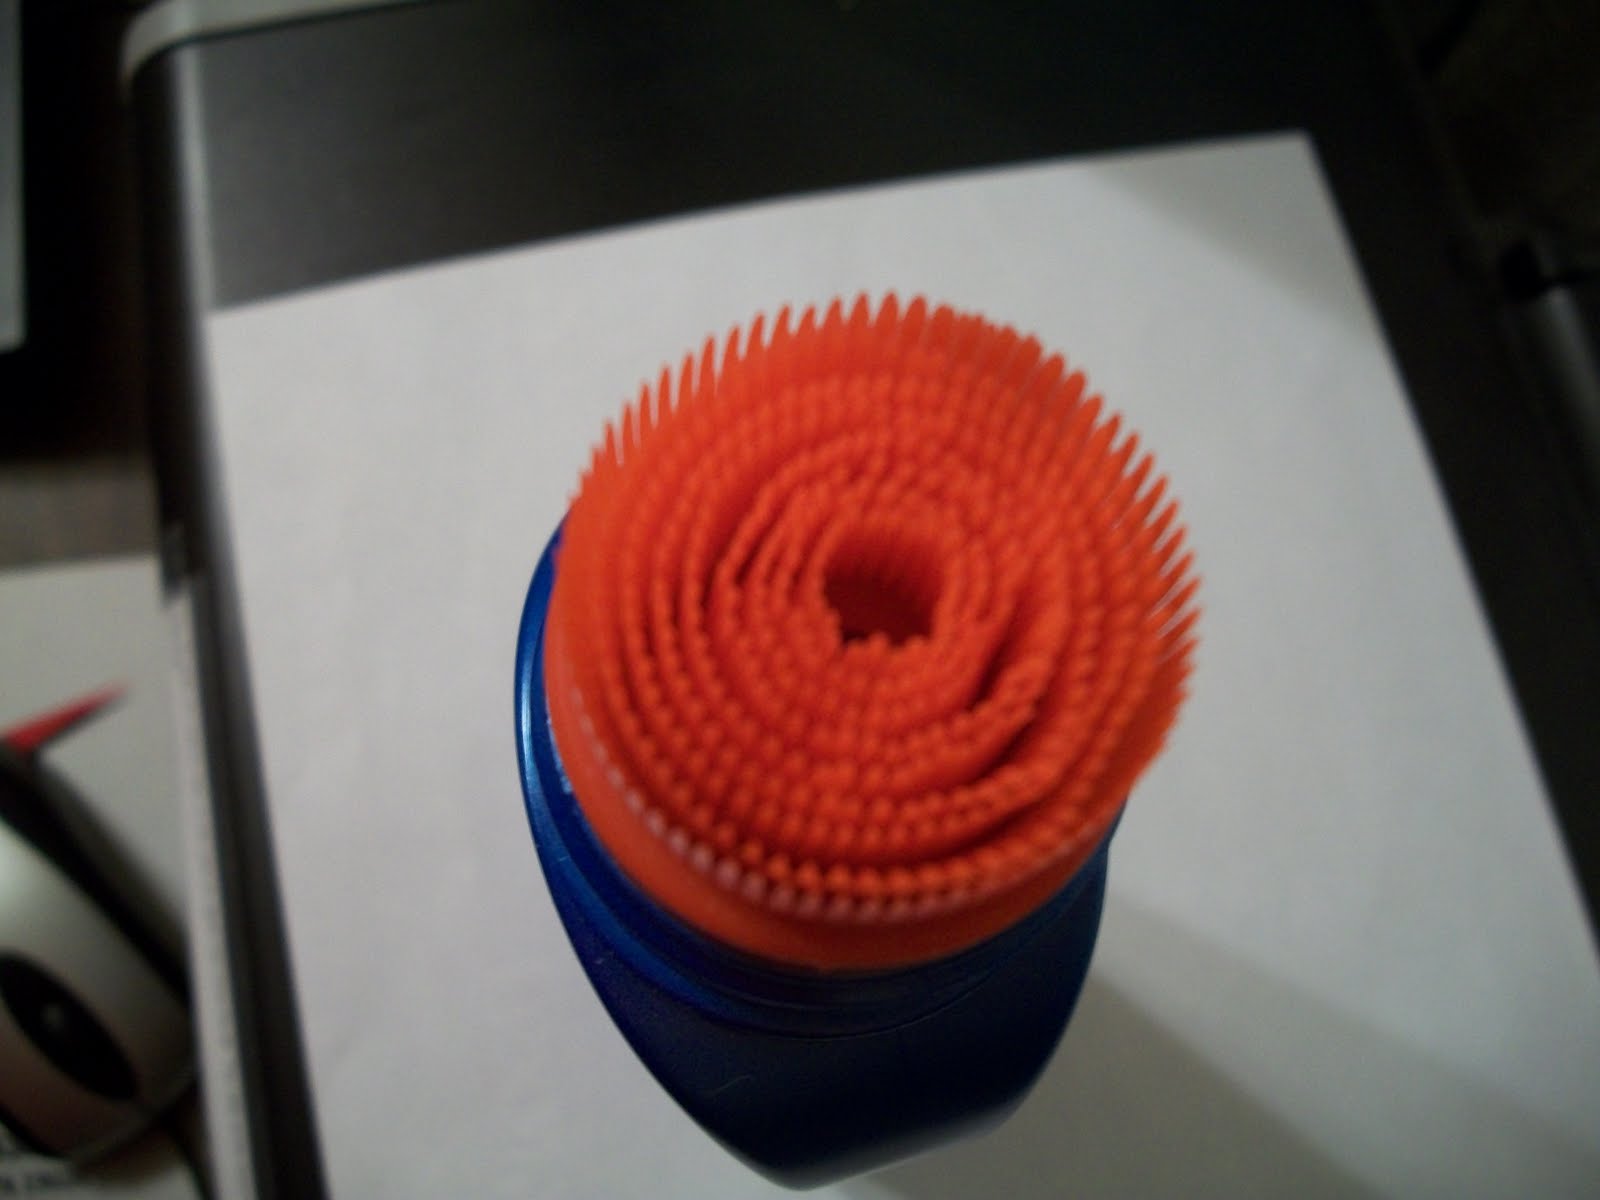
I love this product! Ultra Concentrated Gel SHOUT Advanced Formulated for Heavy-Duty Stains. It seems to get most of the stains out of our clothes. As expensive as clothing can be, this is a good investment to keeping them wearable longer.
The thing I like about it is the plastic 'brush' on the top of the bottle.
Read the instructions before using on your fabrics.
Squeeze out a little of the gel onto the stain and use the brush to rub the fabric.
I have always used the regular spray SHOUT stain remover on our laundry, but I love the gel.
When I was taking these photos for this post, I noticed the spray SHOUT has a Greenlist label on the bottle. It says Greenlist: Our patented process to select raw materials with reduced environmental impact while maintaining high performance. Product not tested on animals. Contains no ammonia, bleach, phosphorus, or dyes. Says we can learn more at www.scjohnson.com


Monday, December 12, 2011

Detergent Scoop Craft

I have tried forever to figure out something fun to do with detergent scoops. I finally got this idea! Maybe it is because I have a collection of tiny Nativity scenes, that this idea came to me.
One Detergent Scoop
Craft Foam
Craft Spanish Moss
Elmer's Glue
Scissors
Hole Punch
Bow (which is not on in these photos)
Glue the Spanish Moss in the bottom of the scoop with the scoop on its end.
Cut out figures that are suppose to look like:
Mary, Joseph and his staff, Baby Jesus, the manger and a star.
Use the hole punch to cut out the faces in the figures.
Punch a hole with pink foam and use the punched out part to make the faces.
I used a ink pen to make dots on the faces for eyes and mouths.
Glue Mary and Joseph in the back and then Baby Jesus in front of them.
Glue the star in the top of the scoop.
If nothing else this made my husband laugh.
I think it would be a fun project for Sunday school or vacation bible school.

My second idea is a Snowman and Tree
One detergent scoop
Craft Foam
Glue
Part of a Cotton Ball
Sharpie
Bow
Floral Wire for Hanger

What ideas do you have for using detergent scoops?
Leave a comment and share your ideas. 

Sunday, December 11, 2011

Pea Ridge, Arkansas

Since today is my birthday, I wanted to take a trip to my hometown and the only way to do it was through these photos. This first building is now Pea Ridge, Arkansas City Hall. When my family moved to Pea Ridge nearly 50 years ago, this was a cafe on the right and a closed gift shop on the left. We moved to Pea Ridge where my Mom opened the cafe. Until we could find a house we lived in the back of the cafe. I am taking the photo from what once was the school grounds.
I did a blog post about Webb's Feed and Seed 10-9-11.
There once was a drug store with a fountain where everyone went for cokes and coffee.
The Pea Ridge Community Library moved this year to a newer facility that was donated to them south of town. This library building is the old Bank of Pea Ridge, incorporated in 1911, and was one of only two banks in Benton County that did not fail during the Depression. After fifty-seven years at this location, the bank moved in 1968 to the new facility at Curtis and Leetown. Most of the businesses have moved south of the original downtown.
In the second block of the Main Street these buildings all stand empty.
There was a hardware store, grocery store, and post office all in this block.
This is a sad site, but still makes me feel like I have traveled home.
If this building was built in 1928, I can't imagine when the other block was built!
This next building is one of a couple buildings left standing on the old school campus. This is where I took Home Economics classes. I learned about sewing, decorating, flower arranging, setting a proper table, cooking, menu planning, budgeting for meals, and lots of other things about everyday life.
The Museum building was the Extension Homemakers building. I went to 4-H meetings there. The baby shower when my son was born was held there. Family reunions have been in the building. The upstairs was the place where my Mom went to Eastern Star. Now this building has some awesome memories of the Pea Ridge area and it's people. There is even a bit of information about the Pea Ridge Riding Club and when I was the riding club queen.
This final photo is one of the "newer" buildings in the downtown area. This was the Continental Telephone office. This is where I got my ears pierced! My mom's friend Carolyn Sue was the office manager at the telephone company. Since my mom was the person who usually pierced every one's ears, I ask Carolyn Sue if she would do mine.

I "rolled" my  ear lobes between my fingers to get them numb the entire last class at school. Then I borrowed a pair of earrings and went to the telephone company office. I took a needle, alcohol, and small potato with me. Carolyn Sue wiped my ear lobes and needle with the alcohol. Put the potato behind my ear and stuck the needle through. Then she put the borrowed earrings in the holes. Cracks me up when people get their ears pierced with a "gun," because I am pretty sure it must hurt less than the old fashion way of doing it. LOL
Thanks for sharing these wonderful memories with me.
Pea Ridge now has four or five banks, McDonalds, Sonic, Subway, Pizza Hut, lots of other eating facilities, dollar store, parts store, several gas station/stores, a huge new school, and the population has exploded. All of Northwest Arkansas has grew beyond anyone's wildest imagination. 

Saturday, December 10, 2011

Not Normal Chicken Soup

I was hungry for bean and corn soup. I looked in the cabinet and I was out of white beans.
Here is what I tossed together instead:
NOT NORMAL CHICKEN SOUP
one can black eyed peas with jalapeno
one can whole kernel corn
one 7 ounce package pasta (I had shells)
one 12.5 ounce chunk chicken breast
one package Lipton onion soup mix
lemon pepper
garlic powder
two cans chicken broth
two or three cups water depending on how thick you like it
Toss every thing into a pot bring to a boil and simmer approximately 30 minutes.
(or until the cornbread you make to go with it is done)
This is not the prettiest soup ever, but it was certainly tasty!
This would make a good New Years soup to get your black eyed peas in for good luck!

Friday, December 9, 2011

CD Santa Craft

Here is another craft project to recycle those CD's that arrived as advertising in the mail.
It also uses one of those advertising magnets that seem to show up too.
CD SANTA CRAFT MAGNET
CRAFT FOAM
GLUE
HOLE PUNCH
SHARPIE
MAGNET
SCISSORS
I free handed a wreath, the "berries" on the wreath, and Santa out of craft foam sheets.
Note that I hole punched a mouth for Santa and poked one of the "berries" in his mouth.
I used a black sharpie to make Santa's eyes.
First I glued down the pink part for his face and then the red part of he hat.
Next I glued all the white pieces on top of the pink and red pieces.
I know it is not a perfect Santa, but Granny's Love aka my Grandson thought it was awesome.
After all the glue on the front pieces were dry I glued a magnet on the back.
If you did not want to make a CD Santa Wreath magnet....
You could make a tree ornament.
Hold a nail with a pair of needle nose pliers and heat the nail and poke a hole in the top of the CD. Decorate the front of the CD with the Santa Wreath. Decorate the back of the CD with a solid piece of craft foam and then glue 2011 on top of that piece. Then put a ribbon through the hole in the CD and you are ready to hang it from the tree.

If you wanted to do this type of craft at school or in a Sunday school group you could buy a package of CD's and they already have two shiny sides to decorate. You could use stickers instead of craft foam sheets that have to be cut out.


Thursday, December 8, 2011

Legend of the Silver Pine Cone

RERUN...from my blog 12-3-10...I love this story and want to share it again.

Go find some pine cones and spray paint them silver and attach a copy of the Legend of the Silver Pine Cone to give as gifts or tie on top of a gift you are giving. We have also made these to give out in the classroom at Christmas, with a copy of the legend attached. Silver Pinecones are suppose to be very lucky. We all need a little extra luck these days.
(these look gold in this photo but they are silver!) 
(check this out...same pine cones...different color fabric made them the silver color)

THE LEGEND OF THE SILVER PINE CONE
There once lived a poor family without enough food to eat or enough wood for their fire. The mother decided to go into the forest to search for pine cones. She was planning to use the pine cones to build a fire for her family, and she was also hoping she could sell some of them to get money to buy food.

After walking for hours, the mother finally reached the forest and started gathering pine cones into her basket. Suddenly, she heard a voice say, "Why are you stealing my pine cones?" with that, an elf appeared beside her. She explained her sad story to the elf. With a crooked smile, the elf said, "Go into the next forest. The pine cones there are much better."

Hesitantly, the mother set off to the next forest, which was even farther away. When she reached it, she was very tired. She leaned against a tree and sat her basket on the ground. No sooner had she set down her basket, and dozens of pine cones started falling to the ground.

Filled with renewed energy, she gathered all the pine cones into her basket and returned home. Exhausted, she set the basket on her doorstep. When she looked down at the basket of pine cones, they had all turned to silver!! The family would never be poor again.

According to legend, it is customary to keep one on your dresser and desk. And a basket of them on the mantle of the fireplace. Hope your holiday season includes silver pine cones.


Wednesday, December 7, 2011

Orange/Pinneapple Pork

Pork Tenderloin with Mandarin Oranges and Pineapple
Pour the liquid from an 11 ounce can Mandarin Oranges
and 8 ounce can Pineapple Slices into a skillet.
Add several "shakes" of each of the following spices:
Lemon Pepper
Onion Powder
Garlic Salt
Seasoning Salt
Accent
Stir and then add
Cut up pieces of Pork Tenderloin and cook until done.
Then add the Pinneapple Slices and Mandarin Oranges and simmer to heat completely.
Cook Brown Rice and add butter and a couple spoons of sugar to the rice.
Cook Green Beans with butter and seasoning salt.
This is a recipe my daughter made up and sent me the photos.
She is an awesome cook. She gets that from her Dad!

Tuesday, December 6, 2011

Cardboard Tube Recycle Ornament

CARDBOARD PAPER TOWEL TUBE RECYCLED ORNAMENT
for each ornament you will need:
One paper towel cardboard tube
Craft Paint
Scissors
Hole Punch
Ruler and pencil
3 Pipe Cleaners (Chenille Stems)
Paint the cardboard tubes with the craft paint and allow to dry.
Flatten the cardboard tube.
Mark and cut it into 3/4 inch wide rings.
I cut and used 12 rings.
On each flattened ring, mark dots 3/4 inches in from each folded edge.
With the hole punch, make holes where you marked the dots.
Start with the inner circle, string the rings onto a pipe cleaner.
Twist the ends together and trim the excess pipe cleaner.
For the outer circle, twist two pipe cleaners together to make a longer piece.
Then thread it through the outer holes in the cardboard rings.
Twist the ends together and trim the excess.
Instead using string or ribbon to hang, I used the left over pieces of pipe cleaner.
I twisted the ends together and then looped under the outer pipe cleaner to make
a hanger and twisted those ends.
If you really wanted to you could paint the inside of the cardboard tube strips.
I personally like the contrast of the bare cardboard.

Monday, December 5, 2011

Christmas Ornament Craft

This Christmas Ornament Wreath is another craft we made to give to classmates and the teacher. If you can find the wreaths on sale it is not very expensive. This craft is easy enough that younger children can help add the "decorations" on the wreath.
FOUR INCH GRAPEVINE WREATH
GREEN TINSEL PIPE CLEANERS
RED TINSEL PIPE CLEANERS
SMALL CHRISTMAS ORNAMENT
small ornaments can usually be found in bulk
ORNAMENT HANGER

Wrap the green tinsel pipe cleaner around the wreath.
Cut small red tinsel pipe cleaner into pieces.
Wrap red tinsel pipe cleaner pieces around green pipe cleaner on wreath
 to make "berries"
Hang small Christmas ornament in the center of the wreath
Add ornament hanger to the top 

Sunday, December 4, 2011

Yogurt Container Craft

Yogurt Container Craft
Yogurt Container
Red Chenille Stem
White Chenille Stem
Red Craft Paint
Black Sharpie
Hole Punch
Paint the yogurt container leaving white at top
Twist red and white chenille stems together
Punch hole on each side of top of container
Hook chenille stems on each side to make a handle
Use sharpie to make "Santa buttons" on container
Fill with goodies to give at parties or to classmates, etc.

Friday, December 2, 2011

Yogurt Lid Ornaments

Yogurt Lid Christmas Tree Ornaments
12 Yogurt Lids
Elmer's Glue
(you could use hot glue)
Sparkle Curly Ribbon
Wrapping Paper
Beads
Craft Foam
12 Paper Clips
Use the yogurt lid to make a circle around the pattern on the wrapping paper you plan to glue to the back of the yogurt lid. You could use scrapbook paper. Cut out the pattern. Mine was Santa.
Glue the Santa on the back of the lid to cover the brand name logo.
Glue the sparkle curly ribbon around the outside of the lid.
I put down a piece of Glad wrap to keep the glue off the table.
Cut out craft foam shapes and glue inside of lids.
or
Glue beads inside of lids.
I did some beads and sequins.
The craft foam shapes I just made up and free handed as I went.
I also used a gold paint pen to write on some of them.
This is where you do what ever type of ornament design you desire.
Next straighten out the small end of a paper clip.
 Poke it through the top of the ornament.
Or you can use a regular ornament hanger.
I love to recycle things. I made these ornaments with items I already had in my craft supplies.
I am also a big fan of homemade tree ornaments, mixed with store bought ones.

Thursday, December 1, 2011

Soup Can Reindeer

Save your soup or veggie cans to make SOUP CAN REINDEER for your children or grandchildren to take to school for the teacher or their class at Christmas. Or you can take them to a nursing home to put on the resident's trays, etc. They are easy and inexpensive to make.
Soup Can
Brown Spray Paint or Acrylic Paint
Red Pom
Two Craft Google Eyes
Two Pipe Cleaners (chenille stems)
Glue

Paint the can or cans.
 Glue on the eyes and nose.
 Glue "antlers" inside can. 

Fill with candy.

We made seventy-five of these one year. That was fun?